AWS IoT Device Shadow#
Introduction#
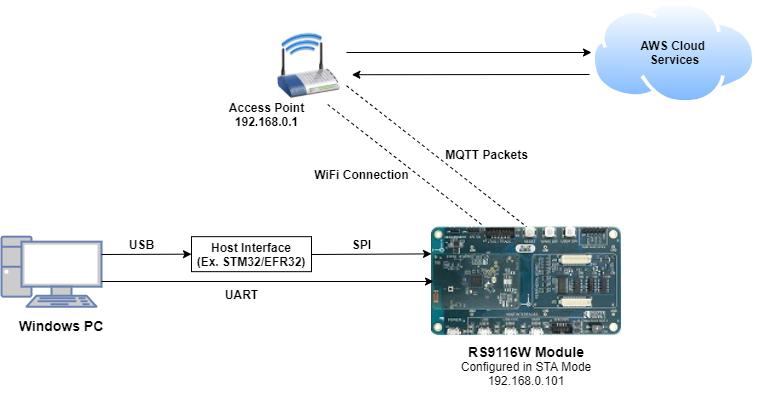
This application demonstrates how to securely connect a Silicon Labs RS911x Wi-Fi device to AWS IoT Core to send and receive data. To successfully use this application, developers should be familiar with the operation of AWS IoT Core and the AWS IoT Device Shadow Service. If you are new to AWS IoT Core, we recommend running through the AWS IoT Core Tutorial before proceeding. In the following text, 'AWS IoT Core' is referred to as 'AWS' for brevity.
AWS refer to a 'Device Shadow' as a persistent, virtual representation of a device that can be accessed even if the physical device is offline. The device state is captured in its 'shadow' and is represented as a JSON document. The physical device can send commands using the MQTT protocol to get, update and delete the state of the shadow as well as receive notifications via MQTT about changes in the state pf the shadow.
The AWS IoT Device Shadow application publishes temperature and window open/close status on the topic $aws/things/thingname/shadow/update.
The room temperature and the window open/close status is available on the AWS cloud.
Additionally, the application subscribes to the shadow update topics:
$aws/things/thingName/shadow/name/shadowName/update/accepted
$aws/things/thingName/shadow/name/shadowName/update/rejected
$aws/things/thingName/shadow/name/shadowName/update/deltaOverview of AWS SDK#
AWS IoT Core is a cloud platform that connects devices across AWS cloud services. AWS IoT provides an interface that allows devices to communicate securely and reliably in bi-directional ways to AWS touch-points, even when devices are offline.
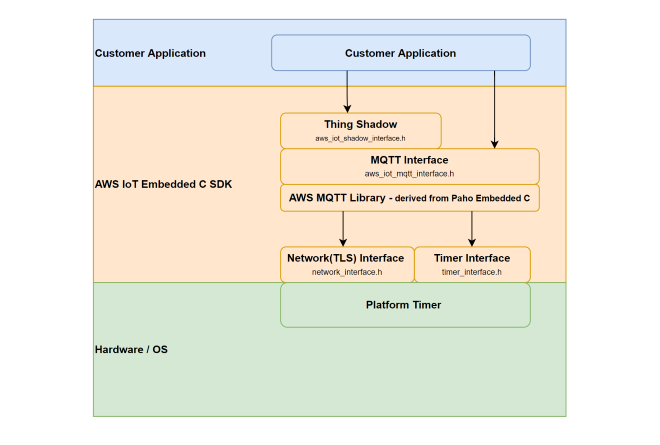
The AWS IoT Device SDK allow applications to securely connect to the AWS IoT platform.
Setting Up#
To use this application, the following hardware, software and project setup is required.
Hardware Requirements#
PC or Mac
Silicon Labs RS9116 Wi-Fi Evaluation Kit
Host MCU Eval Kit. This example has been tested with:
Silicon Labs WSTK + EFR32MG21
STM32F411 Nucleo
Wi-Fi Access point with a connection to the internet
Software Requirements#
Amazon AWS account
Python 3 installation
Embedded Development Environment
For STM32, use licensed Keil IDE
For Silicon Labs EFx32, use the latest version of Simplicity Studio
Cloud Setup#
This example requires your RS911x Wi-Fi device to be provisioned on AWS; you will need the device certificate and private key. For brief provisioning instructions, see AWS IoT Setup.
Project Setup#
Silicon Labs EFx32 Host. Follow the the Getting Started with EFx32 to setup the example to work with EFx32 and Simplicity Studio.
STM32F411 Host. Follow the the Getting Started with STM32 to setup the example to work with STM32 and Keil.
Configuring the Application#
The application can be configured to suit your requirements and development environment. Read through the following sections and make any changes needed.
Host Interface#
By default, the application is configured to use the SPI bus for interfacing between Host platforms and the RS9116W EVK.
The SAPI driver provides APIs to enable other host interfaces if SPI is not suitable for your needs.
Bare Metal/RTOS Support#
To select a bare metal configuration, see Selecting bare metal.
Wi-Fi & Cloud Configuration#
Configure the following parameters in rsi_aws_device_shadow.c to enable your Silicon Labs Wi-Fi device to connect to your Wi-Fi network.
#define SSID "SILABS_AP" // Wi-Fi Network Name
#define PSK "1234567890" // Wi-Fi Password
#define SECURITY_TYPE RSI_WPA2 // Wi-Fi Security Type: RSI_OPEN / RSI_WPA / RSI_WPA2Configure AWS_IOT_MQTT_HOST in the file aws_iot_config.h to match the endpoint for your device in AWS.
#define AWS_IOT_MQTT_HOST "xxxxxxxxxxxxx-ats.iot.us-east-2.amazonaws.com"Power Save Configuration#
Configure below parameter in rsi_wlan_config.h to enable power save mode
#define ENABLE_POWER_SAVE 1Setting up Security Certificates#
To authenticate and securely connect with AWS, your Wi-Fi device requires a unique x.509 security certificate and private key, as well as a CA certificate which is used to verify the AWS server. Security credentials need to be converted into a C-array rather than PEM format provided by AWS; they also need to be added to your project.
The WiSeConnect SDK provides a conversion script (written in Python 3) to make the conversion straightforward. The script is provided in the SDK 'resources' directory and is called certificate_to_array.py.
To convert the device certificate and private key to C arrays, open a system command prompt and use the script as indicated in the following examples.
$> python3 certificate_to_array.py <input filename> <output arrayname>
For example:
$> python3 certificate_to_array.py d8f3a44d3f.cert.pem aws_client_certificate
$> python3 certificate_to_array.py d8f3a44d3f.private.key aws_client_private_certificateAfter running the script on the certificate and private key, two new files are created.
aws_client_certificate.pem.crt.h
aws_client_private_key.pem.key.hBefore proceeding, copy both of the new files to the WiSeConnect directory: <SDK>/resources/certificates
Go ahead and overwrite any existing files with the same name in that directory, the originals are not needed.
The Root CA certificate used by your Wi-Fi device to verify the AWS server is already included in the WiSeConnect SDK; no additional setup is required. For reference, Amazon uses Starfield Technologies to secure the AWS website, the WiSeConnect SDK includes the Starfield CA Certificate.
Testing the Application#
After making any custom configuration changes, and updating the device certificate and private key, build, download and run the application as described in the EFx32 Getting Started or STM32 Getting Started.
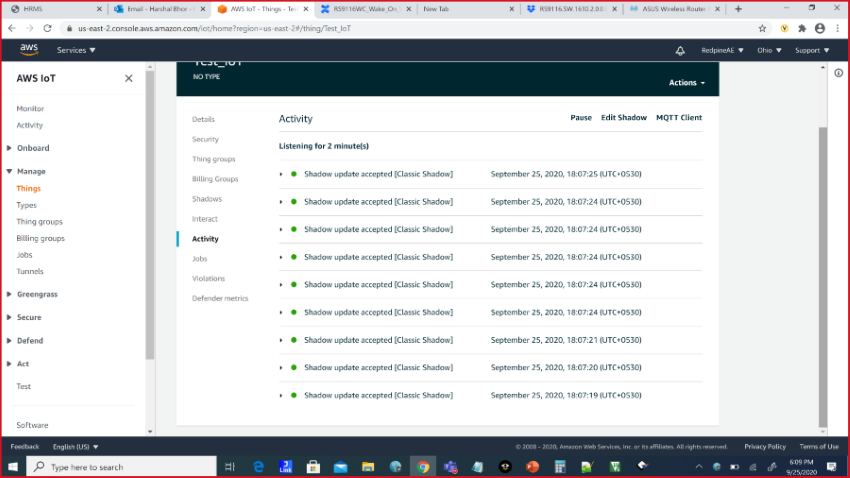
After successful execution, device updates written to AWS can be observed in the AWS thing shadow.
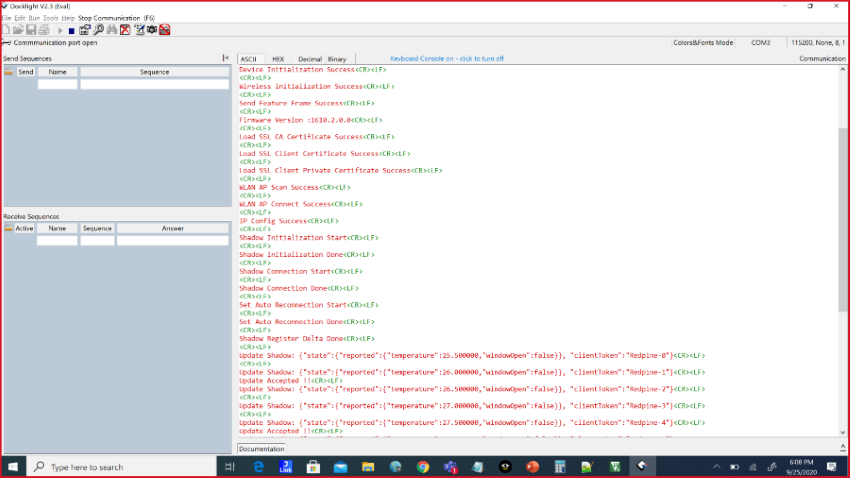
The following debug prints are displayed when the application runs successfully.
AWS IoT Setup#
Create an AWS Thing#
Create a thing in the AWS IoT registry to represent your IoT Device.
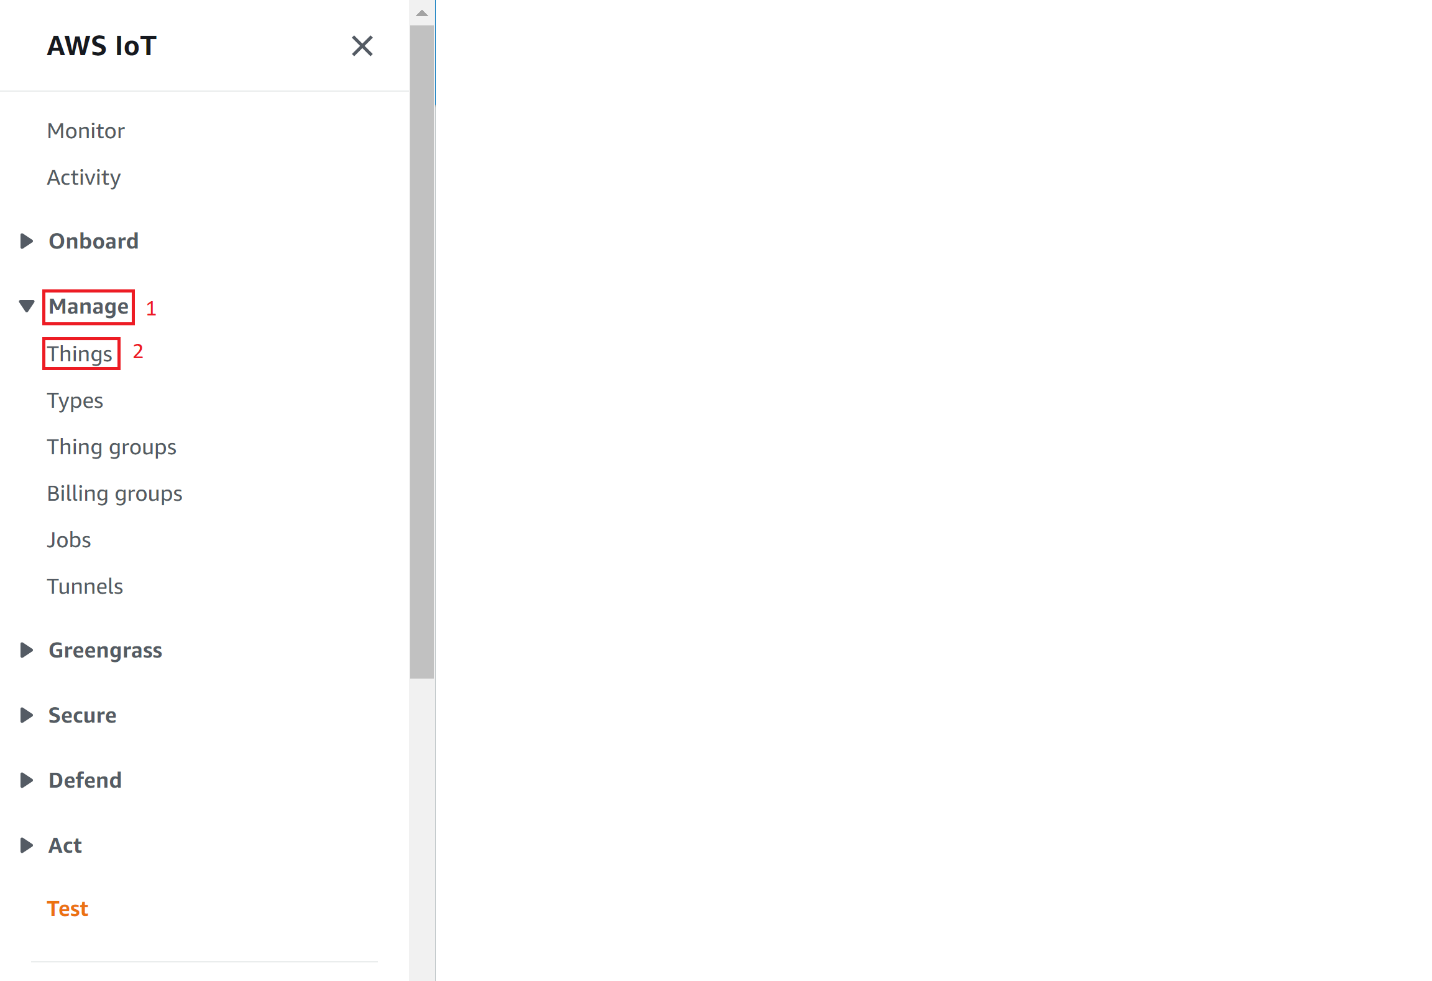
In the AWS IoT console, in the navigation pane, choose Manage, and then choose Things.
If a dialog box "You don't have any things yet" appears, choose Register a thing. Otherwise, choose Create.

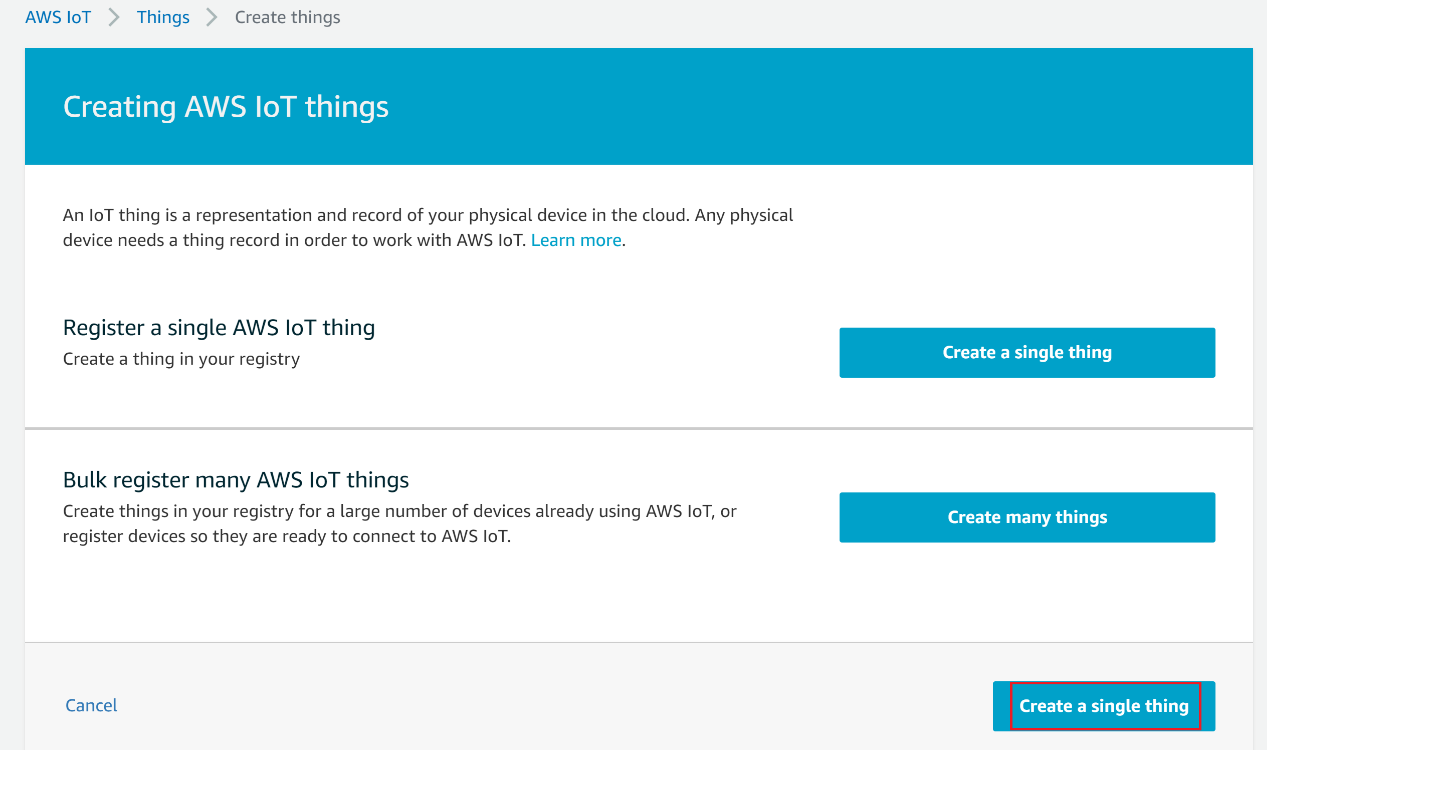
On the Creating AWS IoT things page, choose Create a single thing.
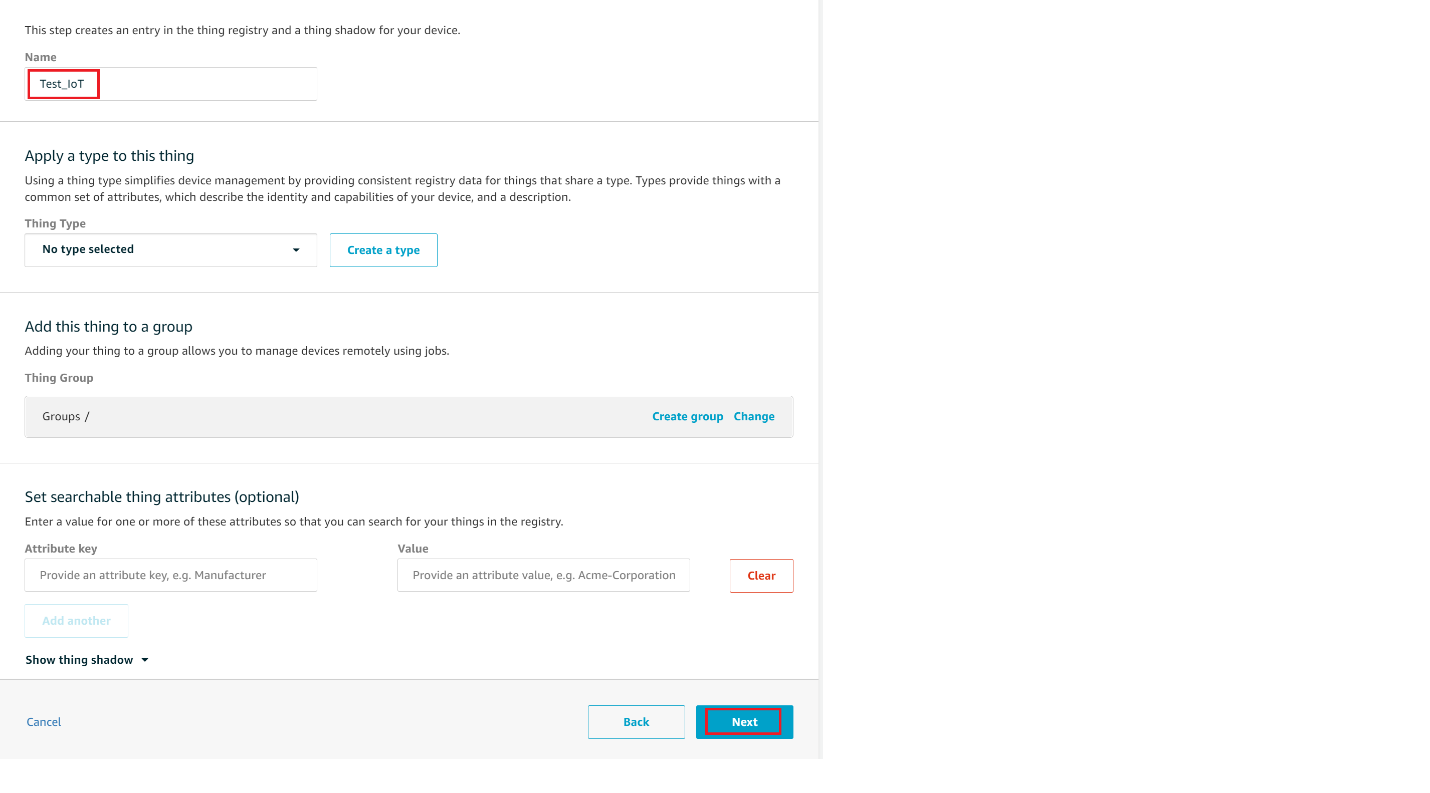
On the Add your device to the device registry page, enter a name for your IoT thing (for example, Test_IoT), and then choose Next. You can't change the name of a thing after you create it. To change a thing's name, you must create a new thing, give it the new name, and then delete the old thing.
On the Add a certificate for your thing page, choose Create certificate.

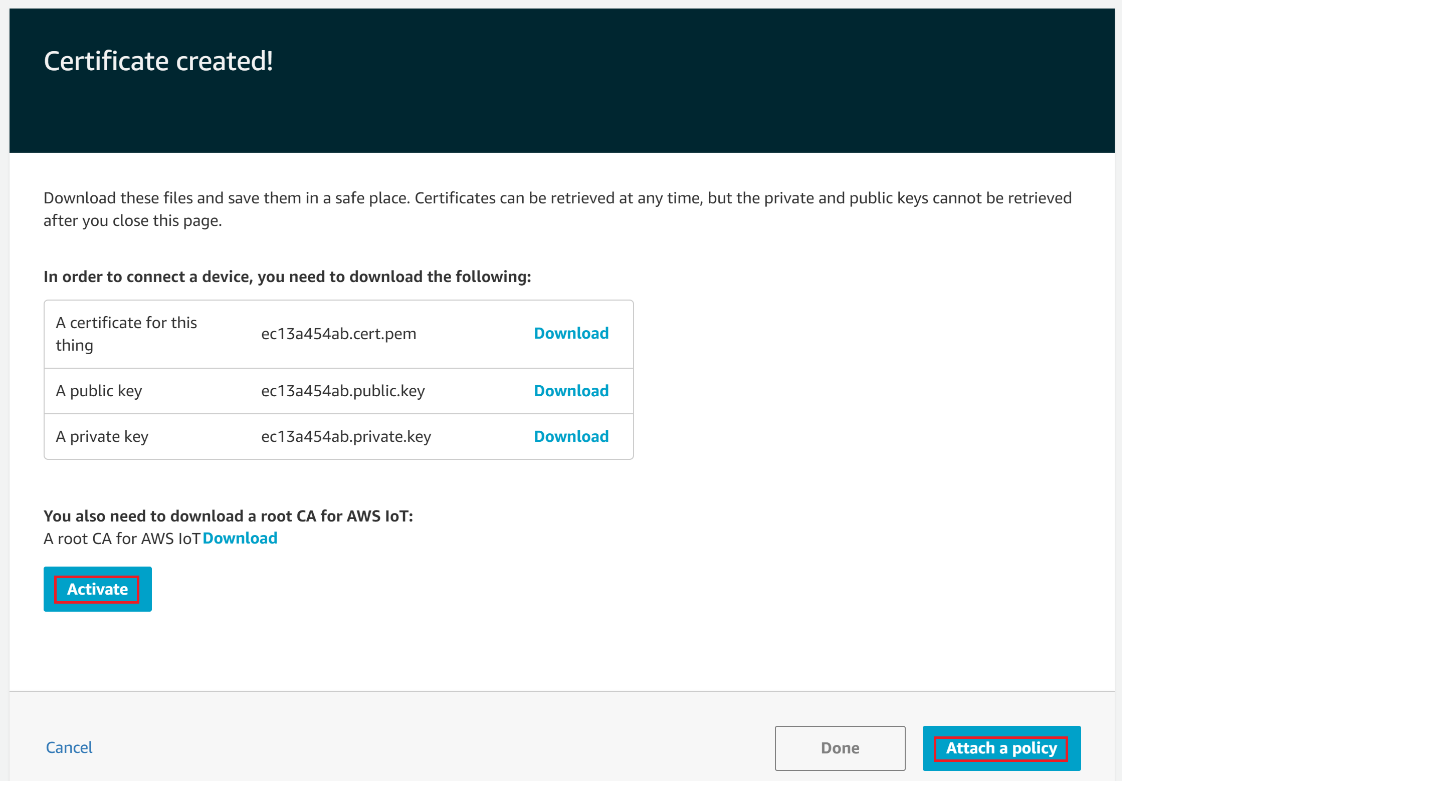
Choose the Download links to download the certificate, private key, and root CA certificate. > Warning: This is the only instance you can download your certificate and private key. Make sure to save them safely.
Choose Activate.
Choose Attach a policy.
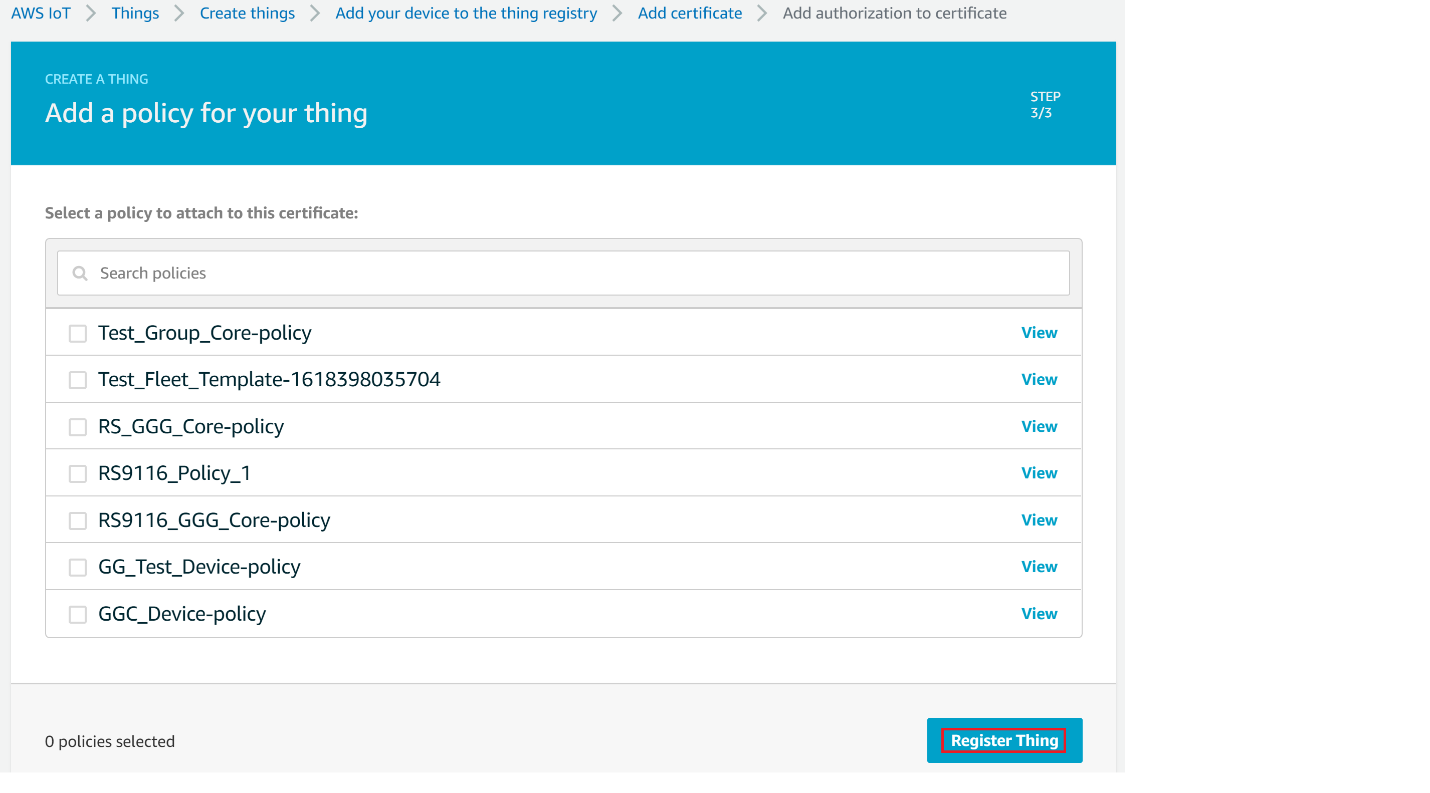
Choose the Policy created and then choose Register Thing.
Note! If you don't have any policy created, follow the steps in Create Policy section in the below and then choose the created Policy
View list of devices as shown
Create Policy#
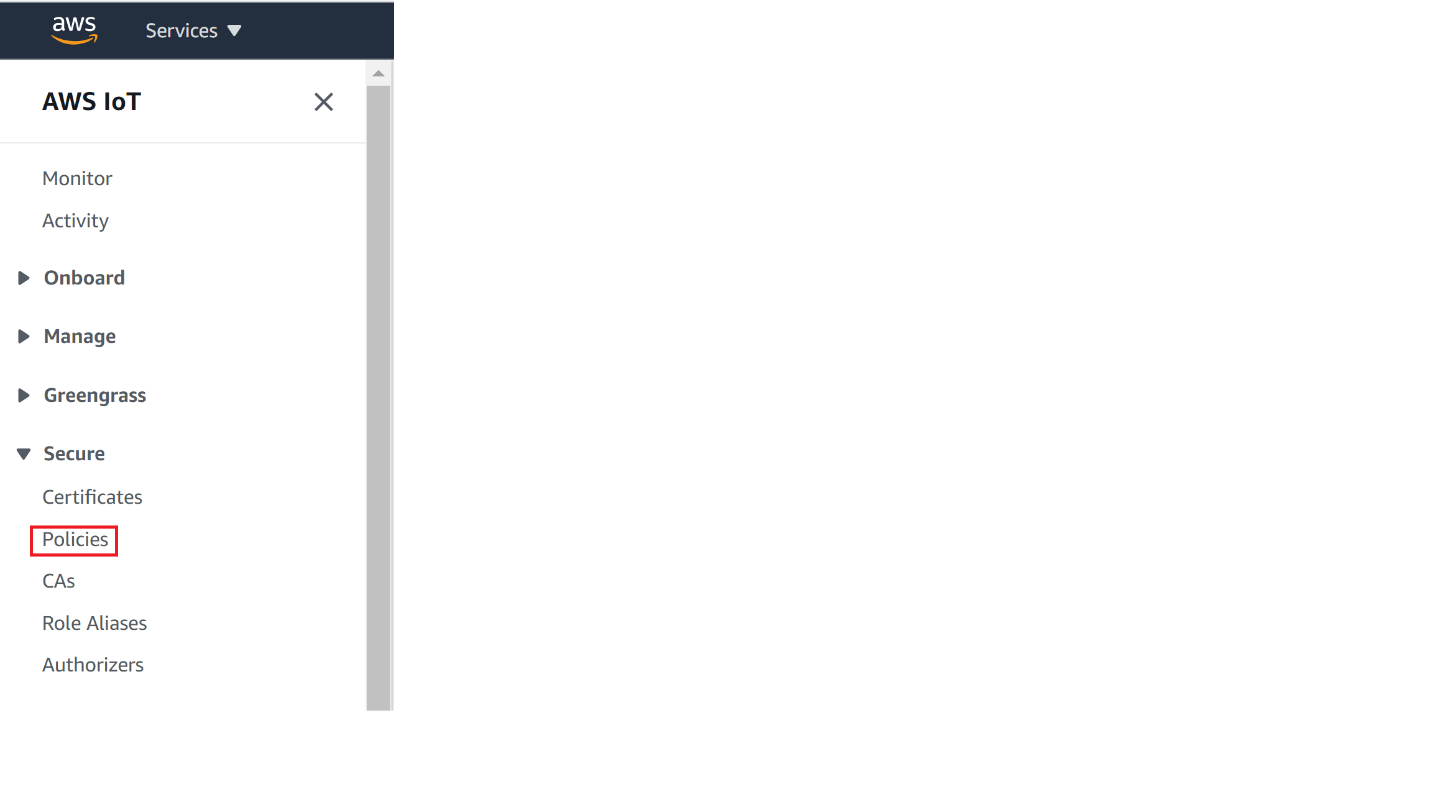
Navigate to AWS IoT console
Choose Policies under Secure
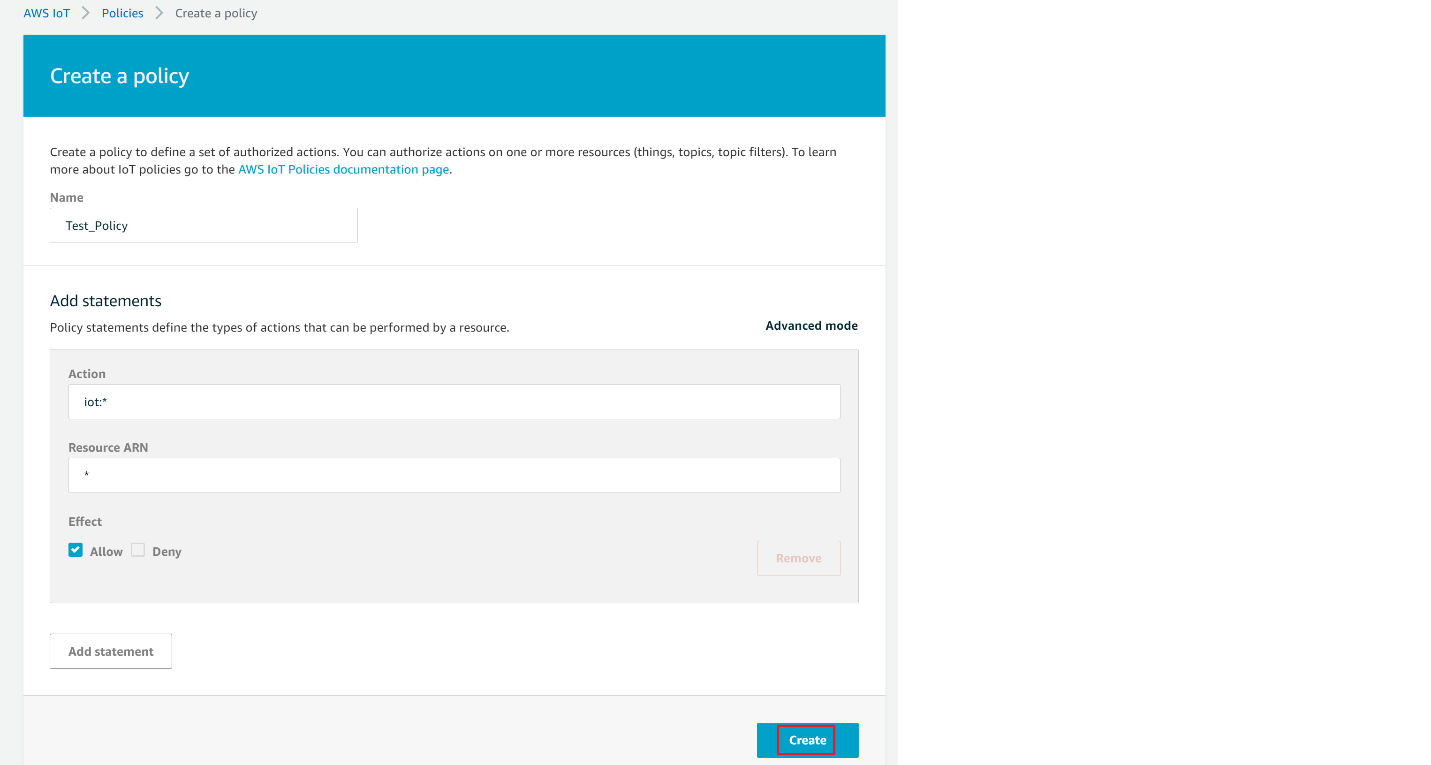
Click on Create
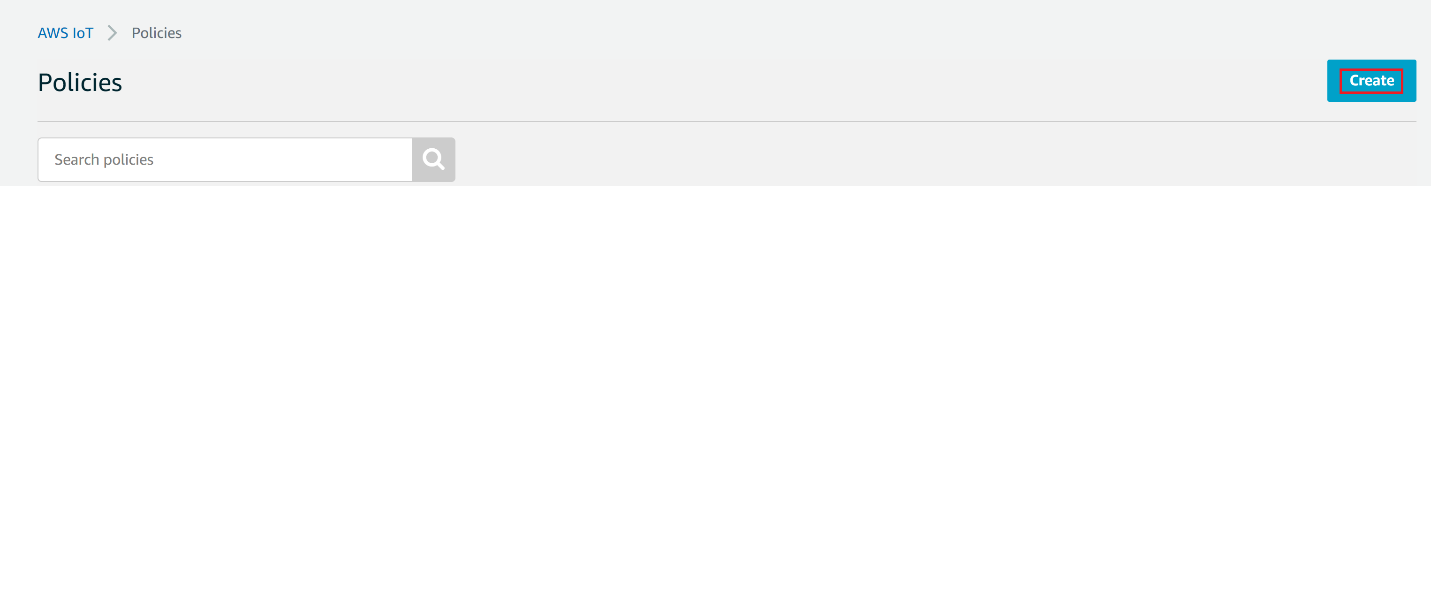
Give the Name to your Policy, Fill Action and Resource ARN as shown in below image, Click on Allow under Effect and click Create
Selecting Bare Metal#
The application has been designed to work with FreeRTOS and Bare Metal configurations. By default, the application project files (Keil and Simplicity studio) are configured with FreeRTOS enabled. The following steps demonstrate how to configure Simplicity Studio and Keil to test the application in a Bare Metal environment.
Bare Metal with Simplicity Studio#
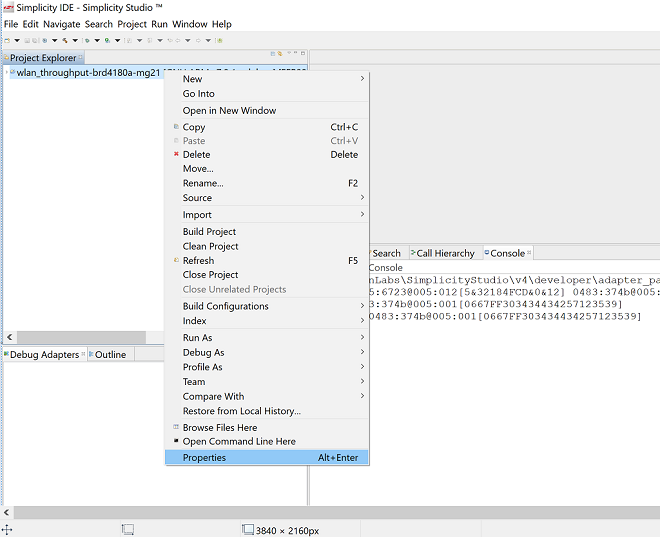
Open the project in Simplicity Studio
Right click on the project and choose 'Properties'
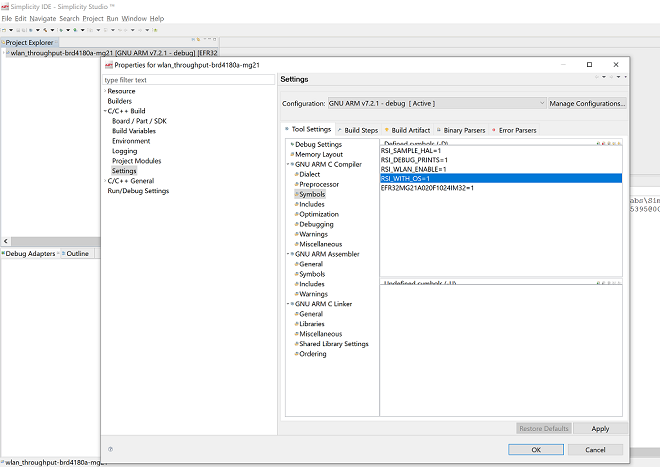
Go to 'C/C++ Build' | 'Settings' | 'GNU ARM C Compiler' | 'Symbols' and remove macro 'RSI_WITH_OS=1'
Select 'Apply' and 'OK' to save the settings
Bare Metal with Keil#
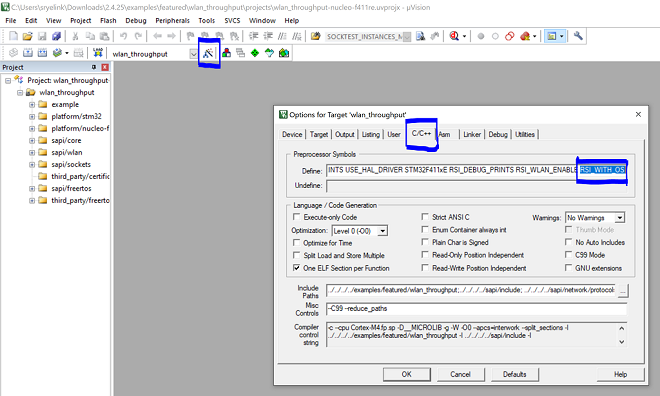
Open the project in Keil and select 'Options for Target'
Go to the 'C/C++' tab and remove 'RSI_WITH_OS' macro present under Preprocessor Symbols
Select 'OK' to save the settings